Cape Primrose
Botanical Name: Streptocarpus x hibridus
Cape Primrose is a showy relative of the African violet. You can expect months of blooms if you keep the soil lightly moist and give it bright, indirect light year-round.
Hundreds of hybrids have been developed to offer some exciting new varieties with bigger flowers, longer blooming time, and more compact foliage. There are even some trailing and dwarf varieties.
 Cape Primrose 'Strawberry Ice' has gorgeous pink flowers. Photo © Khairil Junos
Long, deeply veined leaves grow in a rosette. Those leaves tear easily, so handle this plant carefully. If you happen to tear a leaf, don't be afraid to cut off the damaged part -- streptocarpus is very forgiving. Older leaves will shrivel and turn brown, this is normal. Cut off any old, withered leaves right away.
Above the foliage, tall flower stems carry clusters of trumpet-shaped blooms in shades of purple, violet-blue, pink, red, lavender, white and bicolors. Violet-blue 'Constant Nymph' was the first popular hybrid introduced decades ago. Since then, hundreds of named hybrids have become available. 'John Innes' is also popular for growing indoors, and may be pink, pale violet or purple. Charming 'Falling Stars' is a semi-trailing variety covered with small, violet flowers.
The flowers are velvety, often with contrasting veins or throat color. Flower size also depends on the variety, they may be 1-3 in (2.5-7.5 cm) across.
Cape Primrose Solutions, Answers and Special Helps
Make it bloom. Cape Primrose is sensitive to day length and won't bloom if it doesn't get enough light. Find a place near a bright window for your plant, where it will get several hours of curtain-filtered sunlight. This plant really thrives under fluorescent lights, too. Use 1 warm white tube and 1 cool white tube under a reflector. Place flowers about 8 inches (20 cm) beneath the light for 15 hours a day.
Pinch off spent blooms. Flowers are sometimes followed by long, twisted seed pods. Remove dead flowers as soon as you notice them to encourage more blooms instead of using its energy to develop seeds. Cut flower stems back after the last bloom has faded.
Something bugging your plant? Watch for spider mites that prefer dry conditions. They can invade any plant, especially during the winter months when indoor air is especially dry. They're so tiny, they are hardly visible, but you'll notice fine webbing between the leaves and stems. Isolate an infested plant immediately and treat with insecticide.

How to Repot Cape Primrose
Repot Cape Primrose every 6 months. You'll have a much healthier plant by repotting in spring and again in fall because the fast-growing tuberous roots quickly fill the pot. Streptocarpus is also sensitive to the build-up of salts from fertilizer and likes its "feet" in fresh, loose soil.
What size pot? This plant blooms best when slightly pot-bound, so go up a pot size only when needed. Use the root ball as a guide. A good rule of thumb is to choose a pot that allows only 1/2-inch (1.25 cm) space all around the root ball for a small plant and 1-inch (2.5 cm) for a larger plant. An azalea pot (also known as a half-pot) works well for streptocarpus to keep its roots snug. Make sure it has drainage holes to prevent soggy soil.
Potting Tip
Don't set the plant too deeply in the pot. Keep the plant at the same level it was before because the stems and leaves may rot if they are buried in the potting mix.
How to Repot: Remove the plant from its pot. Gently tease as much old potting mix from the plant as possible. You'll probably pull off a few of the soft, fleshy roots while doing this. Don't worry -- Streptocarpus is a vigorous grower and will soon fill its pot with new roots. Are the roots packed tightly? Tease them apart with your fingers to open them up and help the roots grow into the new mix.
Treat your Cape Primrose well and you'll enjoy this blooming plant for many years. They're easy to propagate, too. Believe me, once you grow these beauties, you can't have just one.

Cape Primrose Care Tips
Origin: South Africa
Height: Up to 1 ft (30 cm)
Light: Bright light or fluorescent light. Keep out of direct sun which can scorch leaves.
Water: Water thoroughly to wet all the roots, then allow the soil to dry out a bit before watering again. Soggy soil may cause root rot -- you'll notice the symptoms as leaves that look limp or turn brown around the edges. Cut back on watering in winter when growth is slowed, but do not allow soil to dry out completely. Avoid getting the leaves wet, which causes spots and they won't come off.
Humidity: Around 50% relative humidity or higher. Indoor air can get extremely dry in winter, so it's a good idea to use a humidity gauge rather than try to guess. Use a cool-mist room humidifier or place pot on a tray of wet pebbles. Keep plant away from heat/AC vents and cold blasts from doors and windows.
Temperature: Cool to average room temperatures 60-70°F/16-21°C. Too-hot temperatures can cause the plant to wilt.
Soil: African violet potting mix
Fertilizer: Feed every 2 weeks in spring and summer with high-phosphorus liquid fertilizer diluted by half. African violet fertilizer is ideal. Take care to fertilize when the soil is already moist to avoid fertilizer burn.
Propagation: Cape primroses are among the easiest of flowering plants to propagate. Here are 3 ways to do it:
- Take leaf cuttings in spring or early summer -- the VioletBarn.com is an excellent site that shows you how step by step.
- Divide plants that have more than one crown (rosette) and pot them separately. (See repotting tips above.)
- Sow cape primrose seeds in spring. The seeds are tiny. The best way to handle them is to sprinkle the seeds from the seed packet over the already moistened seed starting medium, and do not cover seeds. Use a heat mat to maintain a constant 70°/21°C. Cover with clear plastic to maintain high humidity. Mist the medium lightly with room-temperature water every day (if necessary) to keep it moist, but not soggy. You should see those first seedlings poking up in about 10-14 days. Thin out smaller seedlings to give others room to grow. Remove the plastic and give your plants bright light. You can expect those gorgeous flowers about 6 months after sowing.
More to Explore
-
Guide for Growing Miniature Roses Indoors - Mini Rose Care
Jun 01, 26 03:11 PM
 Tips for growing miniature roses indoors. How to take care of miniature roses (Rosa chinensis hybrids) as houseplants. How to pot, prune, water mini roses.
 -
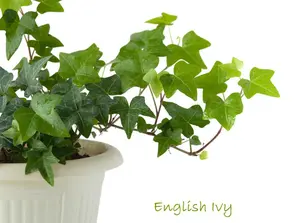
English Ivy Plant Care - Grow Hedera Helix as a Houseplant
May 29, 26 03:21 PM
 Get tips for growing English ivy. Care is easy -- and it's a beautiful house plant with lush, trailing vines. Find out how to water, prune and grow ivy indoors.
 -
Grow Garden Favorites Indoors
May 25, 26 02:25 PM
Heading to the garden center this weekend? Pick up a few extra plants. (Don't you wish you could take them all home?) Many of your garden favorites are a snap to grow as house plants. Add fresh color…